
Because heat pumps use less energy and gas, they are frequently regarded as an environmentally friendly method of heating and cooling a house. However, installing a new heat pump requires a difficult process. The size of the heat pump you choose and its efficiency depend greatly on how well-insulated your home is.
Please carefully read this article if you want to learn how to install a heat pump.
What Is A Heat Pump?
A furnace powers a heating element with gas or electricity before forcing air over the heated element and into the house to warm it. A heat pump uses the heat that is drawn from the air, the ground, or the water nearby to generate heat that is used to warm a house.
A heat pump also functions as an air conditioner, drawing heat from a home’s warm interior air in the summer to keep it cool. Therefore, a heat pump performs the functions of both a furnace and an air conditioner, eliminating the need for two separate units.
At The Beginning Of The Buying Process
First things first: Before you say anything to an HVAC sales representative, make sure they aren’t trying to sell you something that won’t meet your needs in order to make a quick profit.
To get the right-sized equipment, a Manual J Load Calculation must be done. It consists of a number of measurements that cover your home’s various characteristics. This is not a house’s square footage. The old way of doing things, which some people still follow, was square footage alone.
So what is figured into the equation? Parameters include the following:
The amount of insulation, the number and size of windows, the number and type of doors, the total square footage, the area of the floor over the crawl space, the area of the floor over the basement, the number of occupants, the number of rooms without ductwork that require heating and cooling, the height of the ceilings, whether the house is on a slab or not, and other factors.
Based on those factors, there is a huge variation in the need for heating and cooling. There is a very real possibility that you will receive a system that does not satisfy your comfort needs if an HVAC contractor bases their calculations solely on square footage.
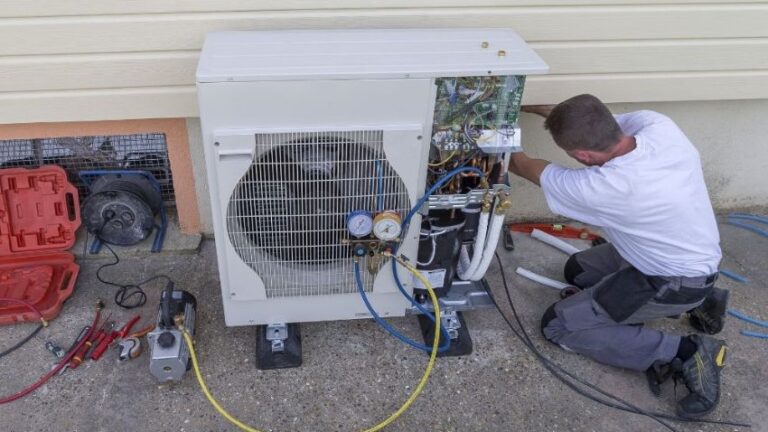
Heat Pump Installation Day
You ought to get a call or text letting you know your installation team is en route before they show up.
A good HVAC company will also send photos and bios of the installation crew that will be working in your home in advance. Before a stranger enters your home, this adds another layer of safety and comfort.
The lead installer will go over the details of the job with you once they arrive. This packet includes details about the equipment, installation accessories, and any special instructions you provided to the estimator prior to the sale.
The other member(s) of the team will start laying down floor protection and setting up tools and equipment while you and the lead installer go over the specifics of the job.
How To Install A Heat Pump?
Disconnecting The Old Heat Pump
Prior to the installation of a new heat pump, a refrigerant from your old one must be removed. It is prohibited to directly vent this refrigerant into the atmosphere in accordance with EPA regulations. To safely and legally remove the refrigerant from the existing heat pump, a recovery machine and recovery tank are required.
Electrical wiring is disconnected from the existing unit after the refrigerant has been recovered. A “whip” (flexible electric conduit) carries the power to the heat pump from the disconnect box. To ensure system security, reputable HVAC companies replace the disconnect and the whip when replacing a heat pump.
The installation of a new disconnect box along with the new heat pump is mandated by safety codes in cases where an old system doesn’t have one. The heat pump is prepared for removal once all of the current connections have been safely removed.
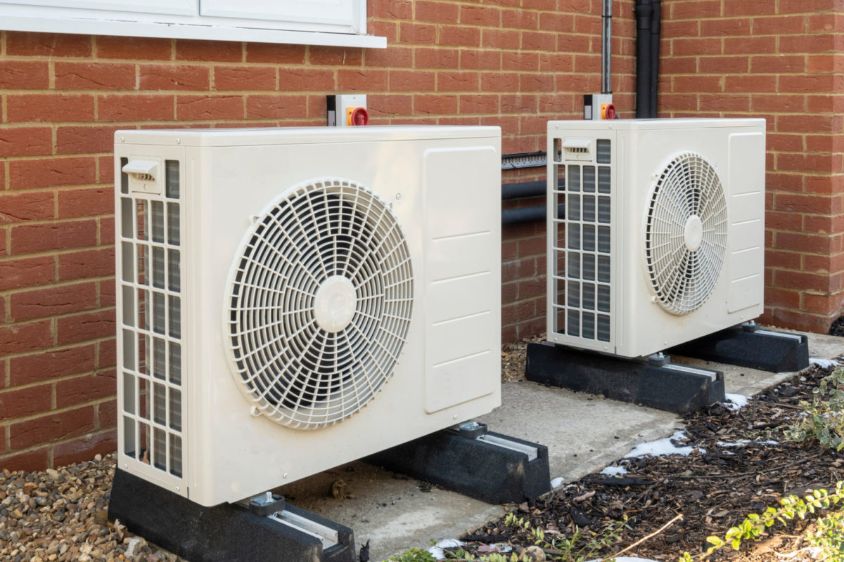
Preparing The Area
The heat pump’s current location will typically need some preparation before the replacement can be installed. Replace the pad that the new heat pump will sit on as part of this preparation work.
The ground needs to be leveled before the new pad can be installed. The area where the new heat pump will be installed is leveled or raised using a gravel base by reputable HVAC companies. The suggested pad is composite. For the duration of the new heat pump, the composite pad is intended to be outside.
Unlike an AC, the heat pump needs to be installed above ground level to allow for proper drainage and to keep the coils free of snow and ice. In Ohio, we raise the heat pump to a height of about 9 inches above the pad. That accounts for the predicted 6 to 8 inches of snowfall. The snow would have to be 10″ or more for it to affect the heat pump.
Even then, it has only penetrated one inch of the coil. We raise the heat pump to prevent snow accumulation against the outdoor coil from freezing or obstructing it.
Removing The Existing Indoor Evaporator Coil
Your heat pump system is made up of two parts, one of which is the indoor evaporator coil. Though occasionally it may be found below the furnace, it typically sits above it. The other end of the refrigerant lines is connected to this.
Two types exist for the indoor evaporator coil. The other is not in a case, while the first is. In either case, the new coil cannot be installed until the sheet metal plenum has been removed. When there is limited access to the coil, this process can become challenging.
After that, the old refrigerant line set can be taken out. This is a pair of copper lines that allow the refrigerant to move from the outdoor condenser back into the indoor evaporator coil.
Any new heat pump can have either an uncased or a cased evaporator coil installed. Because a cased coil is enclosed in an insulated cabinet with front panels that are detachable and provide access to the coil inside, this is the preferred option.
A further feature that makes repairs and modifications simple is that the cased coil is made to simply sit on top of the furnace. The fact that a cased coil is pre-cased by the manufacturer is its main advantage. Due to this, failure resulting from a poor installation is unlikely.
When using a cased coil, it is already “installed” by the manufacturer and merely needs to be placed on the top of the furnace. The last step at that point is to join and seal it to the preexisting sheet metal plenum.
A coil without an insulated cabinet is referred to as uncased. It requires more installation work and takes more time to prepare. When installed properly, an uncased coil will, however, offer the same comfort and performance as a cased coil.
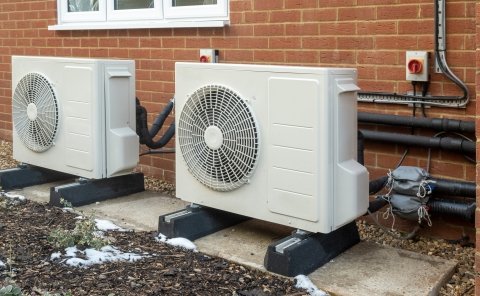
Line Sets And Additional Wiring
After that, the old refrigerant line set can be taken out. Two copper lines are used to transport refrigerant from the outdoor condenser to the indoor evaporator coil.
The suction line refers to the larger line and the liquid line to the smaller one. They arrive in a bundle, coil-wrapped together. The line set will go from the heat pump outside to the new indoor evaporator coil on top of the furnace.
A small, low-voltage control wire will also be present and run from the furnace to the heat pump along the line set. When a call for cooling or heating is made or is satisfied, the small existing wire connecting the thermostat to the furnace sends a low-voltage signal to the heat pump to turn on and off.
A reversing valve on heat pumps alternately switches them between heating and cooling. The heat pump needs to know when to switch, so unless the thermostat is set to do it, an outdoor sensor must be installed.
Additional wiring is required to turn off the heat pump and use only heat strips after which everything depends on how the thermostat is programmed. At some point, the heat pump must be aware of the outdoor temperature.
Following that, the line set is shaped and attached to the correct heat pump service valve. The service valves must be fitted with the line set before being brazed into place. The copper line set and service valves are joined using the welding process known as brazing, which combines two gases (oxygen and acetylene) with a filler rod made of an alloy metal and silver. The valves are heated to a minimum of 1200°F, or until the filler rod flows to join the pieces.
If this procedure is carried out correctly, the service valve, filler rod, and copper line set are all melted together to create a secure, leak-free connection.
Installation Of The New High- And Low-voltage Wiring
The high- and low-voltage wiring needs to be reconnected for the heat pump system to function. The installer will mount a new service disconnect box using the existing electrical panel power inside the house. Using the proper fasteners for the type of surface it is being mounted to, the disconnect is firmly mounted to the side of the house.
In accordance with the condenser installation instructions, the low-voltage control wire is directly connected to the heat pump condenser at the appropriate locations. This is the “signal” from the control board in the furnace sent through the wire to the heat pump when the thermostat calls for cooling.
The low-voltage control wire enables the heat pump to cycle in accordance with the preset limits for indoor temperature and humidity. The control board inside the furnace has designated terminals where the low-voltage wiring is connected.
The thermostat will be installed after the low-voltage connection outside is made by the installer. They can specify different parameters depending on the system.
It is possible to set the heat pump to run until the temperature falls to 35 degrees. The furnace or air handler will then turn on its heat strips. The heat pump is unable to function below a certain temperature. It practically stops moving.
To enter defrost mode, the heat pump needs to be instructed. It will carry on operating in any other case. The call to turn on the heat strips is made when the heat pump is in defrost mode.
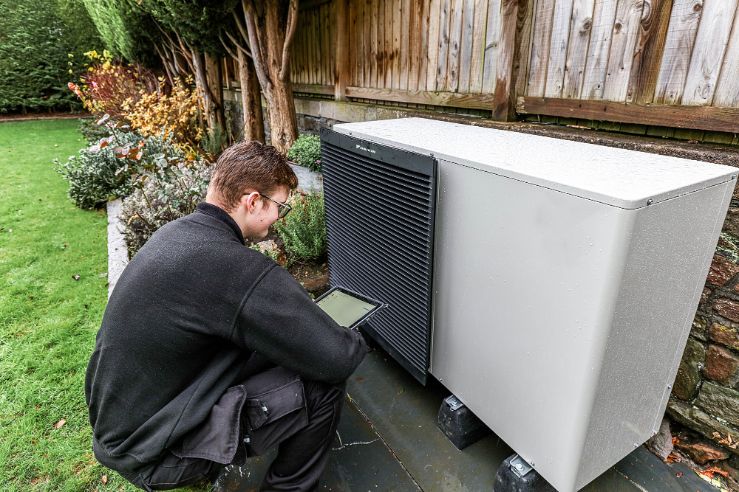
Commissioning Process For A Heat Pump
Following the system’s complete installation and readiness for use, the startup and commissioning (testing) process is carried out. The system is turned on and needs to run for 15 to 20 minutes. By doing this, the system will be able to move the refrigerant.
A heat pump will need to be put into operation for anywhere between 45 and 2 hours, which is 15 to 45 minutes longer than an air conditioner. The heating side will need to be tested by an HVAC contractor.
Additionally, there is the cooling side and defrost. as well as the emergency heat. The system will operate at its peak performance after thorough testing of every feature. Additionally, it will fulfill the requirements for the unit’s warranty.
A quality installer will examine numerous other functions in addition to the thermostat’s operation and the system’s operational sequence. Training and specialized equipment are needed for commissioning to be done properly. On a job site, it also necessitates more time and labor. The only accurate way to assess how well your system is performing is through commissioning.
Clean Up And Closing Process
Relatively little work goes into the cleanup. To remove everything from the house, load up the old tools and materials. Rolling up the floor protection last will keep all installation-related debris inside the drop cloth and out of your house.
Sweeping and clearing away of all materials and debris is required in all areas. You should anticipate finding the area in the same state as when it was discovered.
It should be done with you to go over what was done during the installation. It is expected to go over all special instructions, maintenance requirements, and safety concerns. Reviewing the thermostat’s operation and commissioning is the last step. The customer must be able to switch between regular heat and emergency heat (also known as auxiliary heat) on their thermostat.
Heat Pump Installation Cost
Even though heat pumps are less expensive to run than furnaces, especially in places where the winters are not very cold, the initial cost of installation can be high. The cost of installing a heat pump ranges from $4,000 to $7,500 with the national average of around $5,500. At the low end, your installation costs could run around $2,500, while on the higher end your costs could range up to $10,000.
Benefits Of Choosing A Heat Pump
Some homeowners choose to install a heat pump to cut down on energy costs as the cost of electricity keeps rising. However, there are additional advantages, such as preserving necessary floor space in the house and potential tax credits.
Tax Credits
A 30 percent federal tax credit is available to homeowners who installed geothermal heat pumps before the end of 2019. A credit of 26% is offered for units installed in 2020. The 22 percent credit is still available to homeowners who install geothermal heat pumps before the end of 2021, but all federal tax credits are set to expire at that time.
A heat pump installer is likely to be aware of whether any state or local credits are offered in your area.
Energy Efficiency
Living in a moderate climate allows homeowners to save more on utility costs; in fact, they can save up to 50%, making heat pumps an environmentally friendly way to lessen carbon footprints. The use of heat pumps is restricted in areas where temperatures frequently drop below freezing because they are less effective there.
Climate
Warm-weather homeowners might not want to spend the money to install a furnace. Even so, they might go through phases where having a little extra heat inside during the winter feels good.
This is the best climate for a heat pump because it can function as an air conditioner in the summer and then switch to heating the air in the home in the winter without the need for a separate furnace. Around $5,696 is the average price paid nationwide to install a heat pump.
Space Saving
Homeowners want to make the most of every square foot because building a house today is much more expensive than it was just ten years ago. A 3-foot by 3-foot furnace will occupy 9 square feet of space in the house and have a maximum height of 6 feet.
A utility closet, storage, or other appropriate uses can now be accommodated in the space that a furnace once occupied. Heat pump air handlers are installed high up on exterior walls out of the way, and their lines run outside the house.
Environmentally Friendly
Heat pumps are an environmentally friendly choice because they require less energy to heat and cool a home, which reduces demand on the electric grid. Heat pumps have a seasonal energy efficiency rating (SEER), and the higher the rating, the more energy-efficient the device. The cost of receiving higher ratings is also higher.
A high-efficiency unit over 19 SEER costs between $3,100 and $4,000, whereas a 13 to 14 SEER unit costs between $1,000 and $2,100, not including installation.
Versatility
Homes with heat pumps can be heated and cooled. They utilize heat from the air, water, or soil to warm the interior of the house in the winter. In the summer, they draw heat from the heated indoor air and create cooler air by using refrigerant lines. A heat pump functions like a standard air conditioner in the summer.
Return On Investment
Anytime you make changes to your house, there’s a chance you’ll get a return on your investment (ROI) when it comes time to sell. You may get a return on your investment of up to 70% by installing a heat pump. It goes without saying that this will change depending on the kind of heat pump you have installed and its age when you sell the house.
Cleanliness And Maintenance
Air produced by heat pumps is more hygienic and cleaner than air produced by forced-air furnaces. This is due to the fact that a furnace dries out the air, raising the possibility of airborne dust particles. Heat pumps, however, might require more frequent maintenance due to their complexity. The typical range of expected repair costs is $150 to $600.
Safety
Because there is no fuel combustion and no release of potentially harmful fumes, an electricity-powered heat pump is safer than a gas-powered furnace. Additionally, a mini-ductless heat pump, which ranges in price from $2,000 to $14,500, is less likely to release airborne allergens, allowing residents with allergies to dust and other substances to breathe more easily.
Lifespan
Installing a heat pump may have some drawbacks for some homeowners because it only lasts about half as long as a typical furnace. Ten to fifteen years is roughly how long a heat pump lasts, whereas twenty to thirty years is more like how long a furnace lasts. However, choosing a heat pump could help homeowners save money over time (on utilities) in areas where electric rates are skyrocketing.


